The software that you use to program the Arduino is called the Arduino Integrated Development Environment (IDE). If you are a software developer and accustomed to using complex IDEs like Eclipse or Visual Studio, you’ll find the Arduino IDE very simple—and possibly find yourself wishing for repository integration, command completion, and the like. If you are relatively new to programming, you will love the Arduino’s simplicity and ease of use.
Installing the IDE
The first step is to download the software for your type of computer from the official Arduino website: http://arduino.cc/en/Main/Software. Once you’ve downloaded the software, then you can find detailed installation instructions for each platform here: http://arduino.cc/en/Guide/HomePage.
The Arduino team has also produced an online IDE that runs in your browser. This is not as comprehensive as the offline version and so it will not be used in this book.
One of the nice things about the Arduino is that all you need to get started is an Arduino, a computer, and a USB lead to connect the two. The Arduino can even be powered over the USB connection to the computer.
Blink
To prove that the Arduino is working, we are going to program it to flash an LED that is labeled L on the Arduino board and hence is known as the “L” LED.
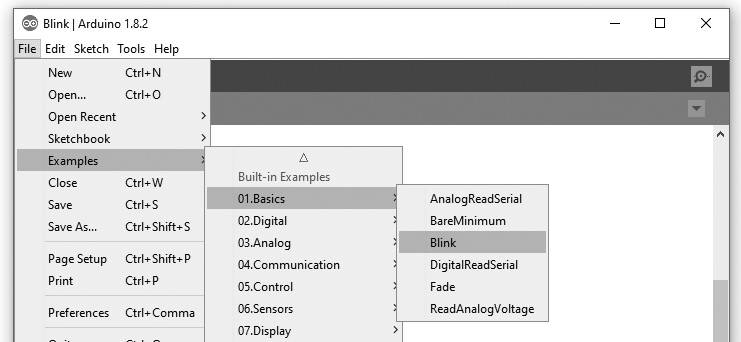
Start by launching the Arduino IDE on your computer. Then, from the File menu select Examples | 01 Basics | Blink.
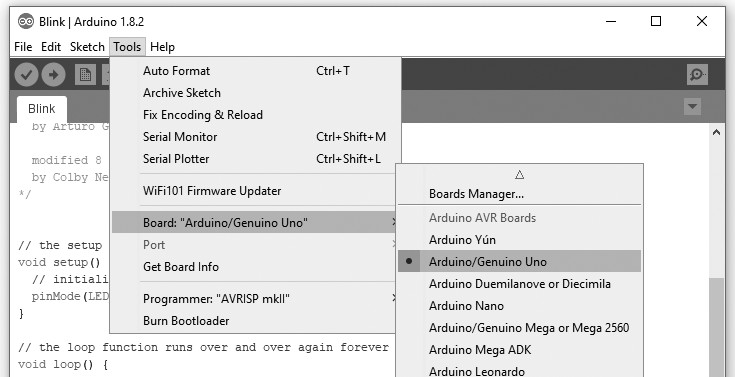
In an attempt to make programming the Arduino sound less daunting to nonprogrammers, programs on the Arduino are referred to as sketches.Before you can send the Blink sketch to your Arduino, you need to tell the Arduino IDE what type of Arduino you’re using. The most common type is the Arduino Uno, and in this chapter, I assume that is what you have. So from the Tools | Board menu, select Arduino Uno.
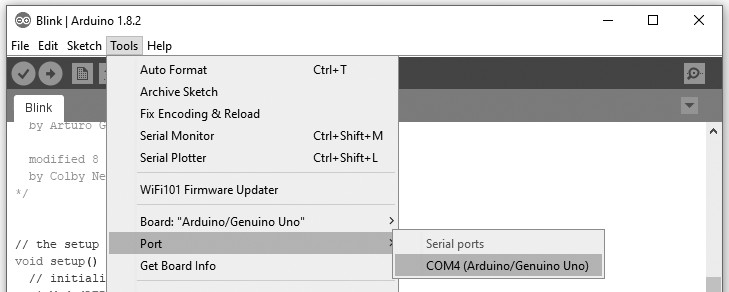
As well as selecting the board type, you also need to select the port it is connected to. In Windows this is easy, as it is usually COM4 and will probably be the only port in the list. On a Mac or Linux computer, however, there will generally be more serial devices listed. The Arduino IDE shows the most recently connected devices first, so your Arduino board should be at the top of the list. If you are still not sure which is your Arduino, unplug it and see which entry dissapears from the list.
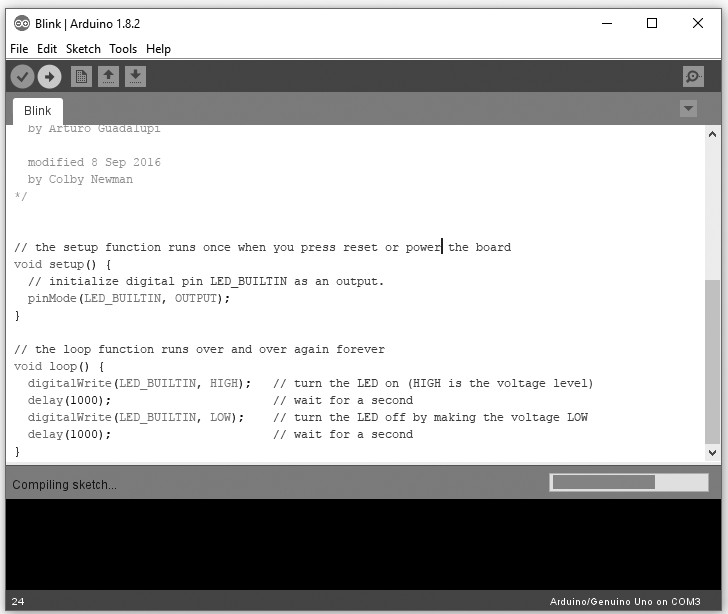
To actually upload the sketch onto the Arduino board, click the Upload button on the toolbar. This is the second button on the toolbar.
Once, you click the Upload button, a few things should happen. First, a progress bar will appear as the Arduino IDE compiles the sketch (meaning it converts the sketch into a suitable form for uploading). Then, the LEDs on the Arduino labeled Rx and Tx should flicker for a while. Finally, the LED labeled L should start to blink. The Arduino IDE will also display a message like “Binary sketch size: 1,084 bytes (of a 32,256 byte maximum).”
This means the sketch has used about 1 kB of the 32 kB of the flash memory available for programs on the Arduino. Before you start programming, let’s have a look at the hardware that your programs, or sketches, will have to work within and have available for their use.